Jogging the Robot
Follow the below steps to jog the Kawasaki robot:
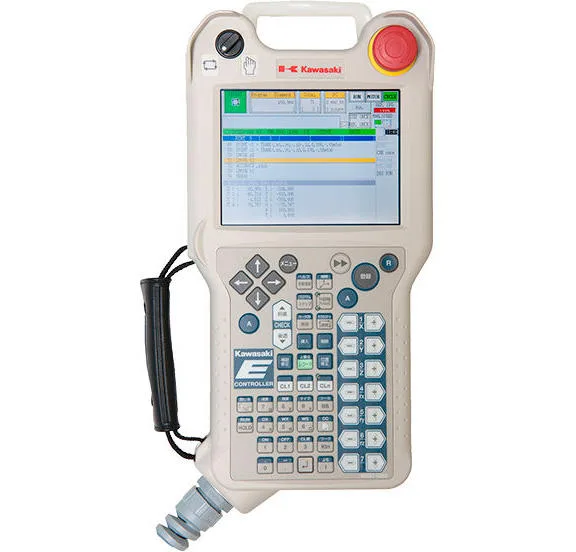
- Ensure the teach pendant and robot controller are in Teach mode. This is done by changing the switches at the top left of the teach pendant and the front of the controlled (key switch).
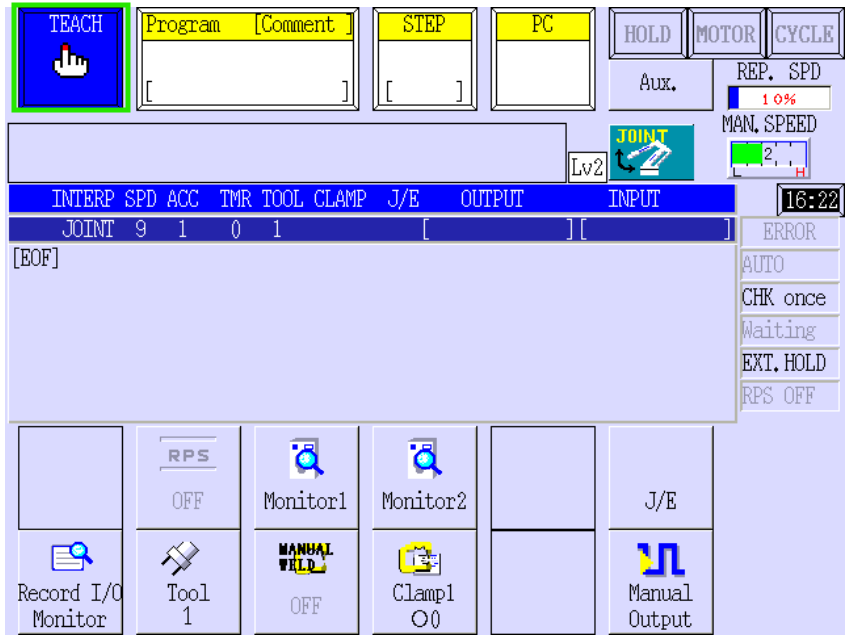
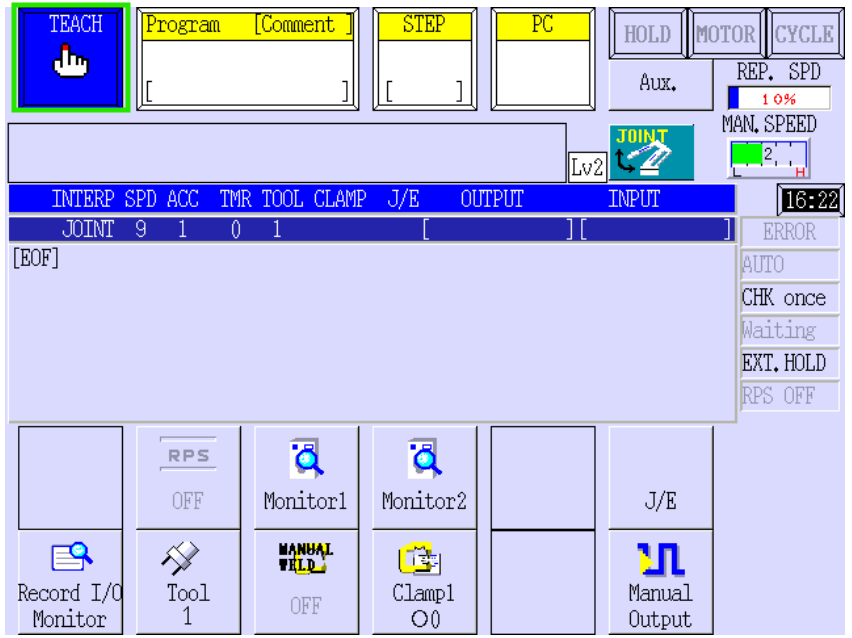
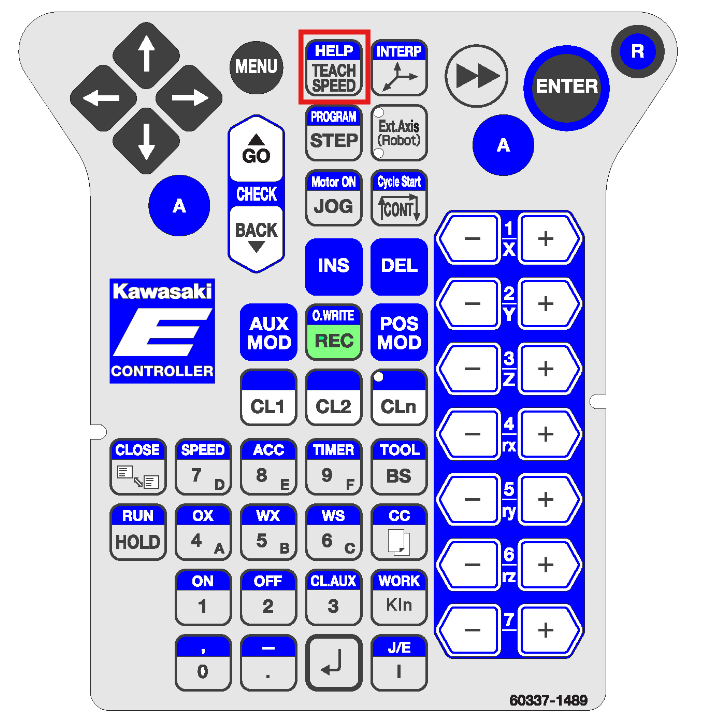
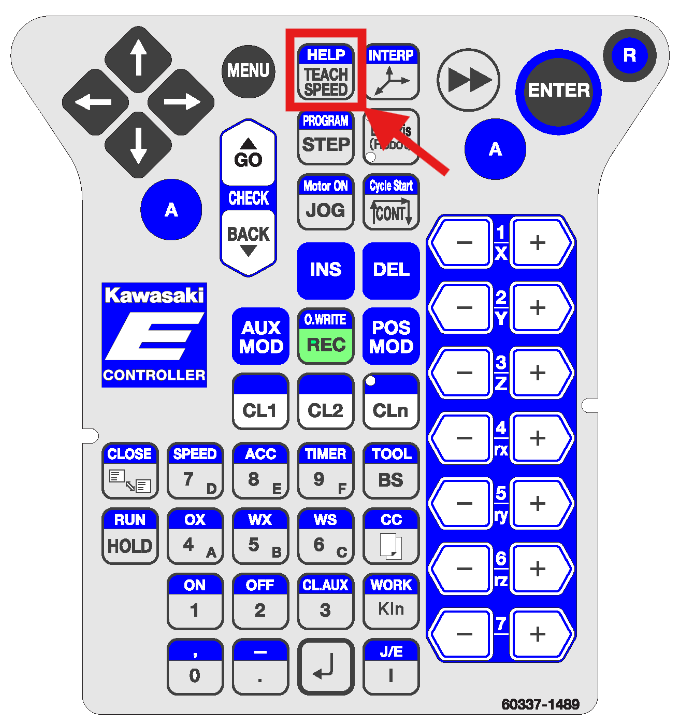
- Ensure the speed of the robot is set low (2 or 3) to avoid sudden movements of the robot arm while jogging.
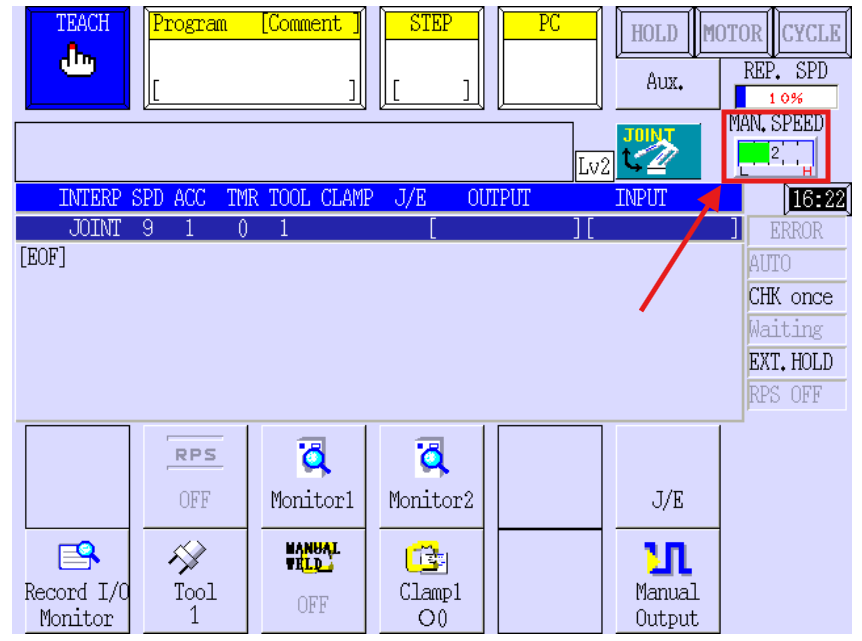
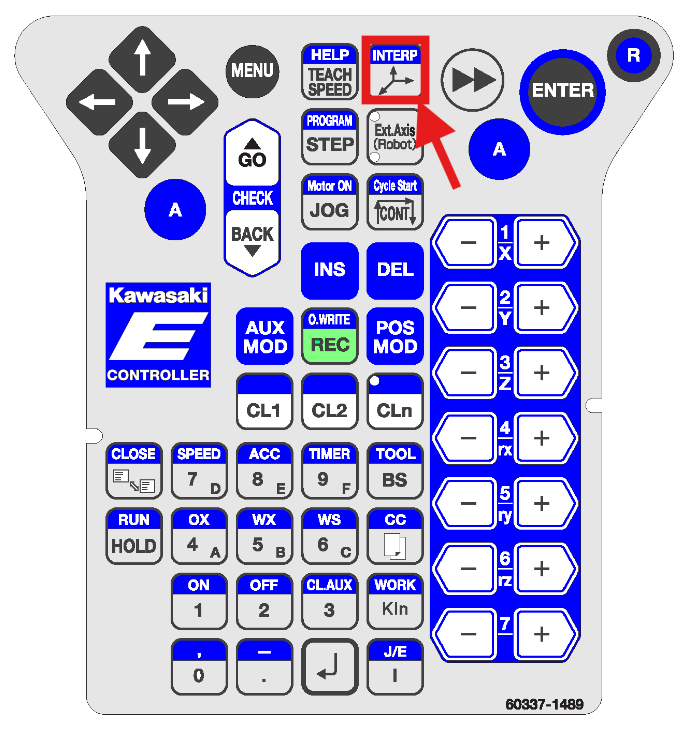
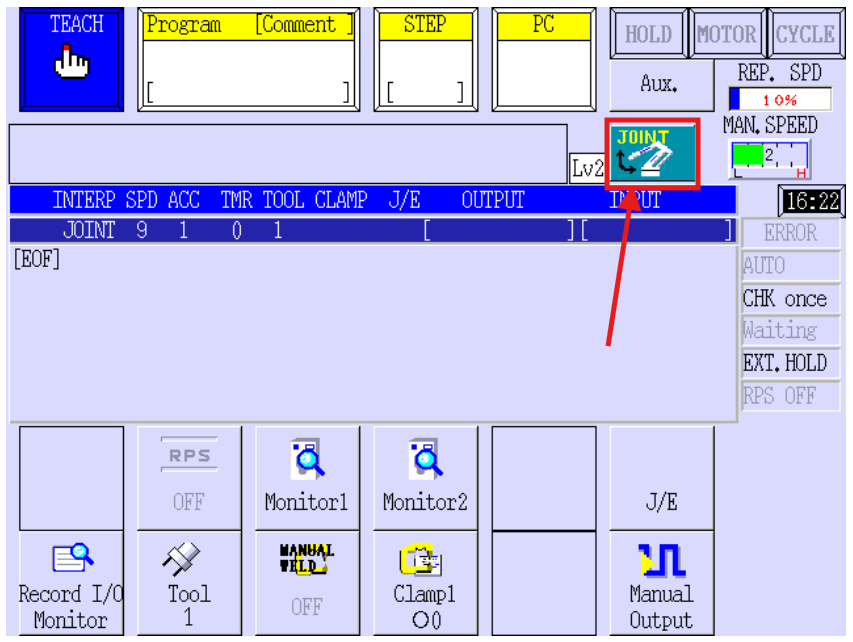
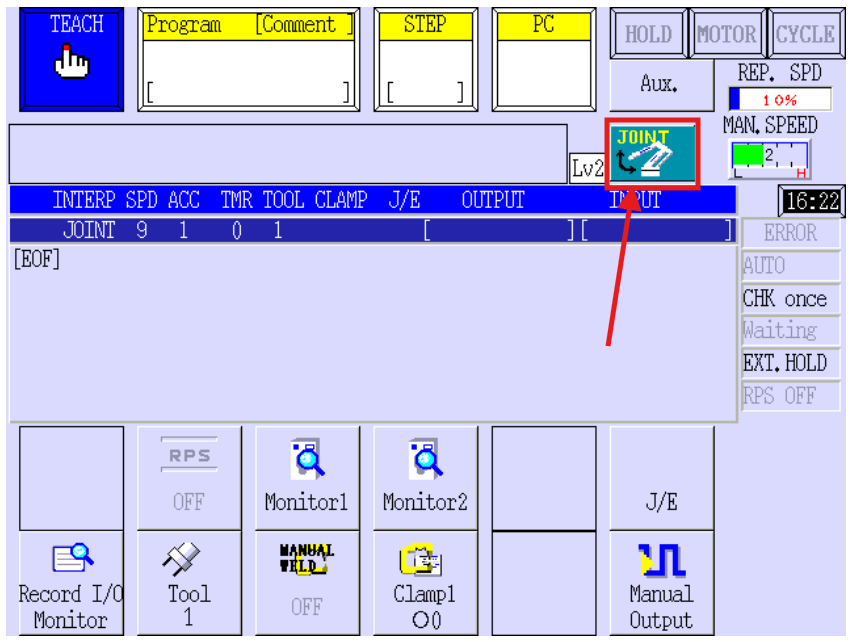
- Ensure the coordinate frame of the robot is set to the jog mode that you want. Joint jogs the joints independantly of each other (Joints 1-6), while Base and Tool jog the robot in cartesian coordinates respective to the base of the robot or the tool.
The base of the robot is joint 1, and the flange at the end of the robot is joint 6.
In Base coordinates, +Y is forward in respect to the base of the robot, +Z is up and +X is right.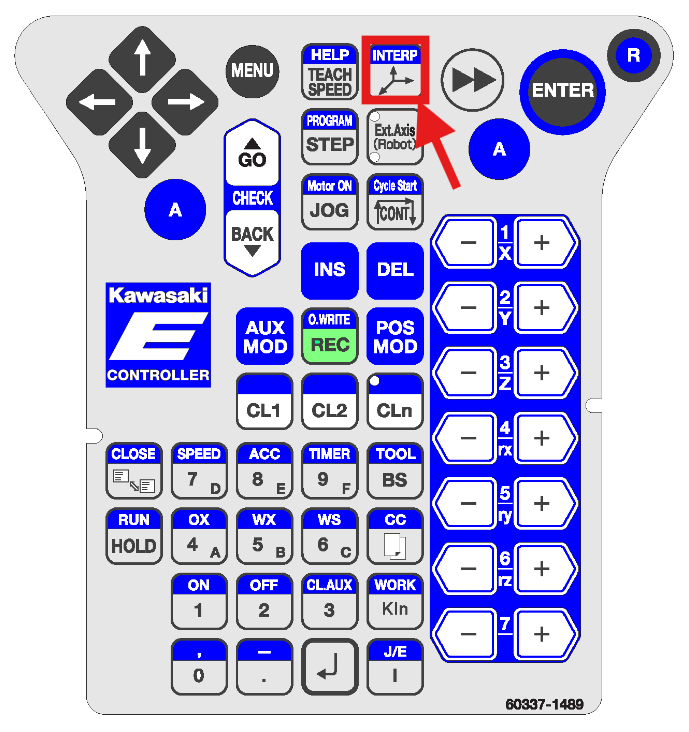
- Hold the "deadman" 3-position switch on the back of the pendant in the middle position. Pressing too far, or not pressing at all will Emergency Stop the robot while in Teach mode.
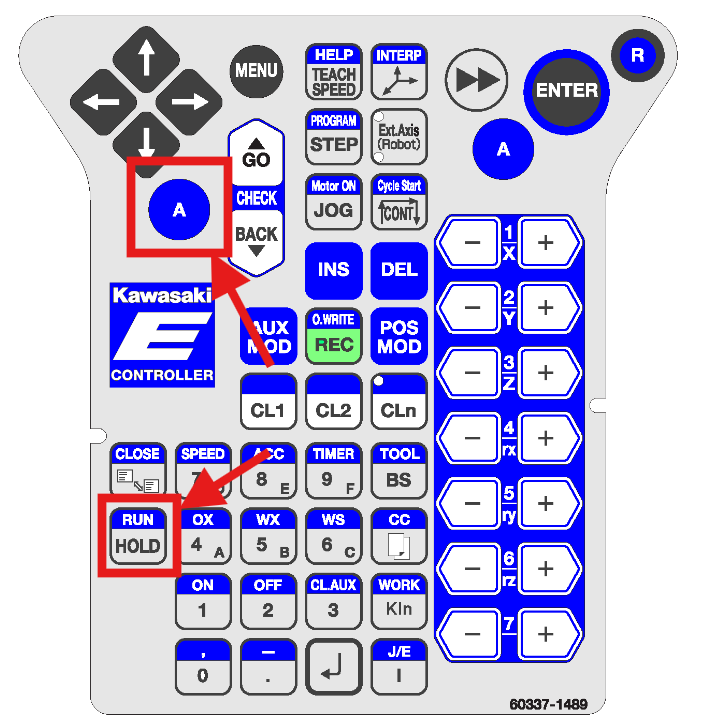
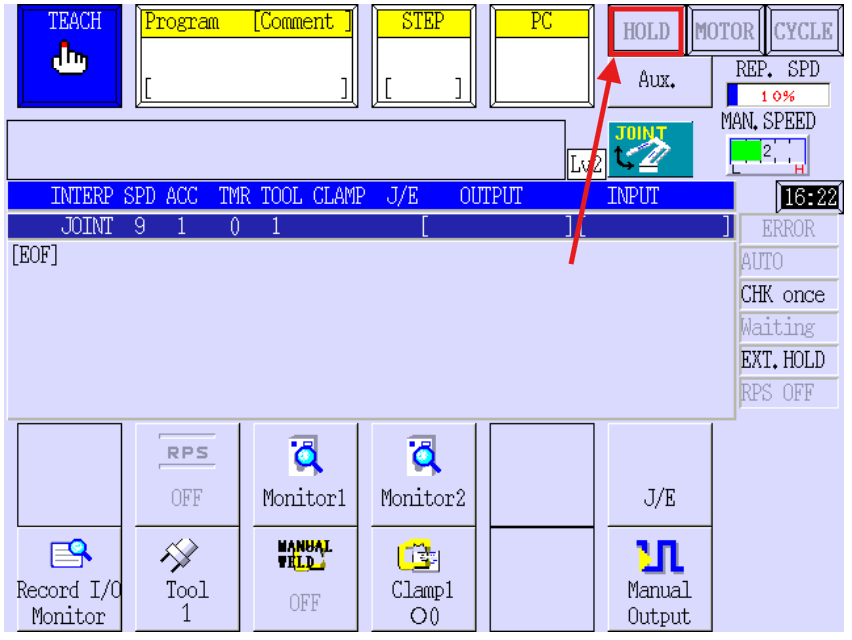
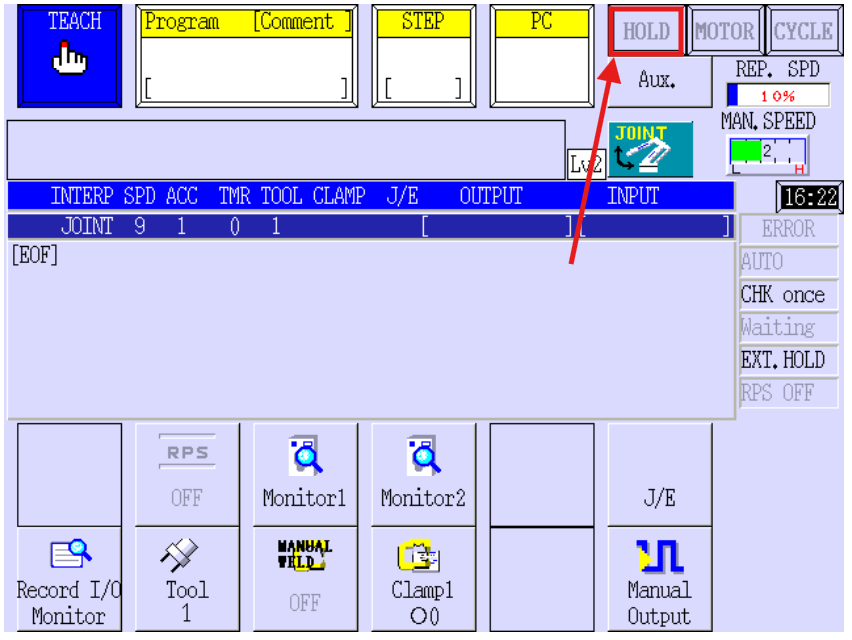
- Make sure that the robot is NOT in HOLD mode. If HOLD is displayed, press the A button and the RUN Button. RUN should appear at the top of the screen.
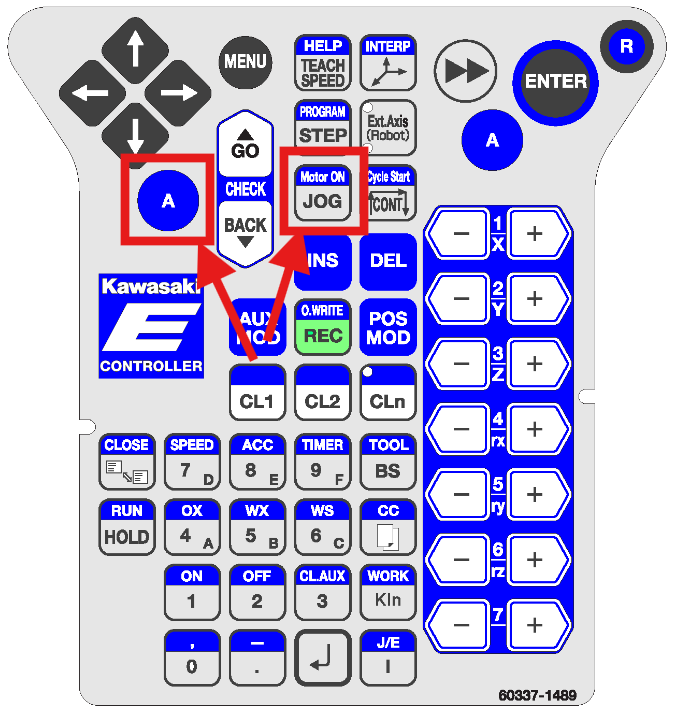
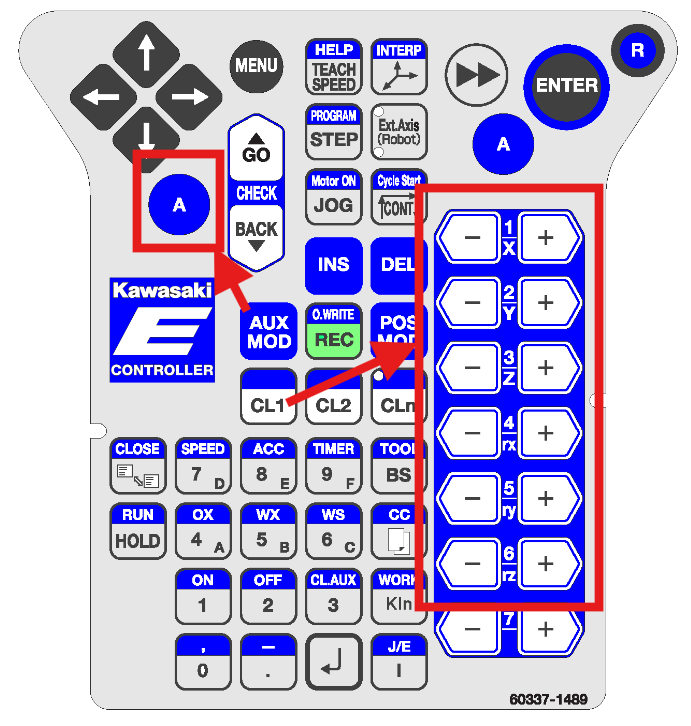
The A key is like a shift key that enables the functions of buttons that are in BLUE
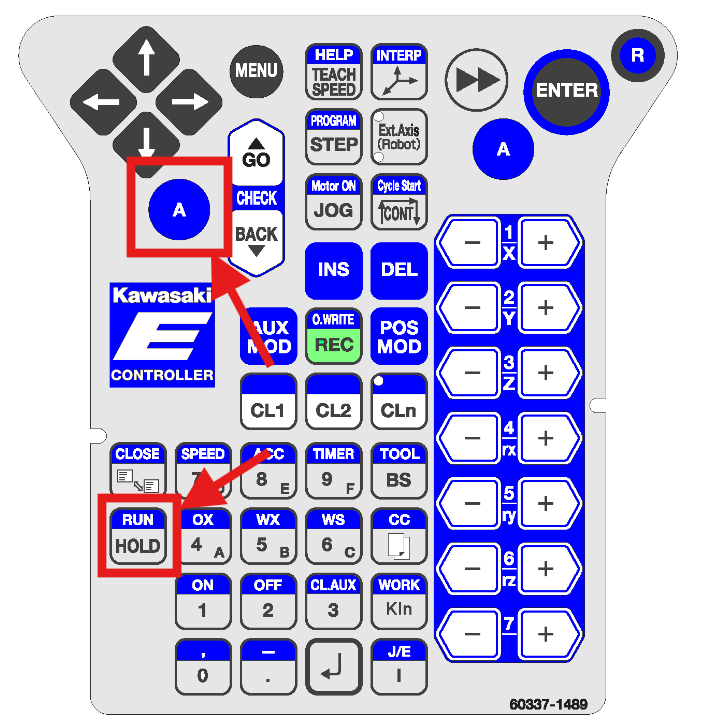
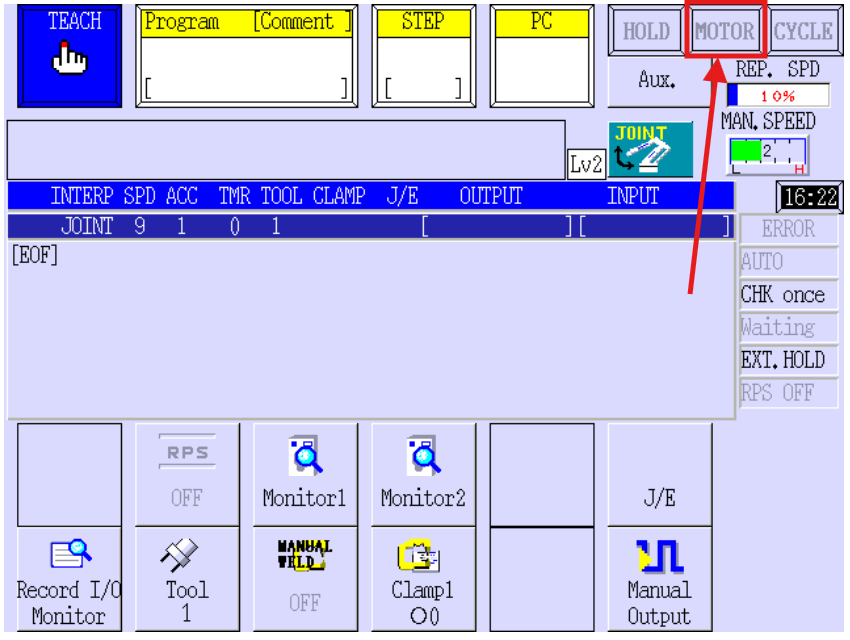
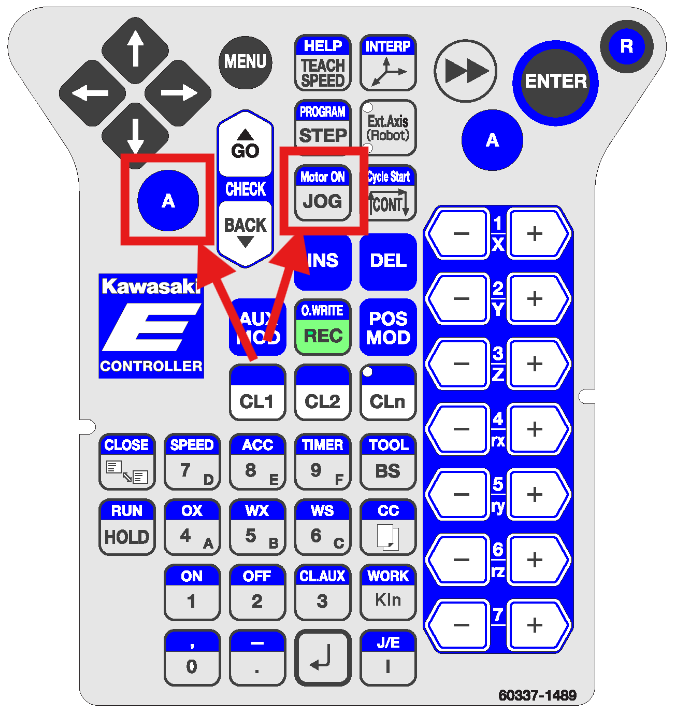
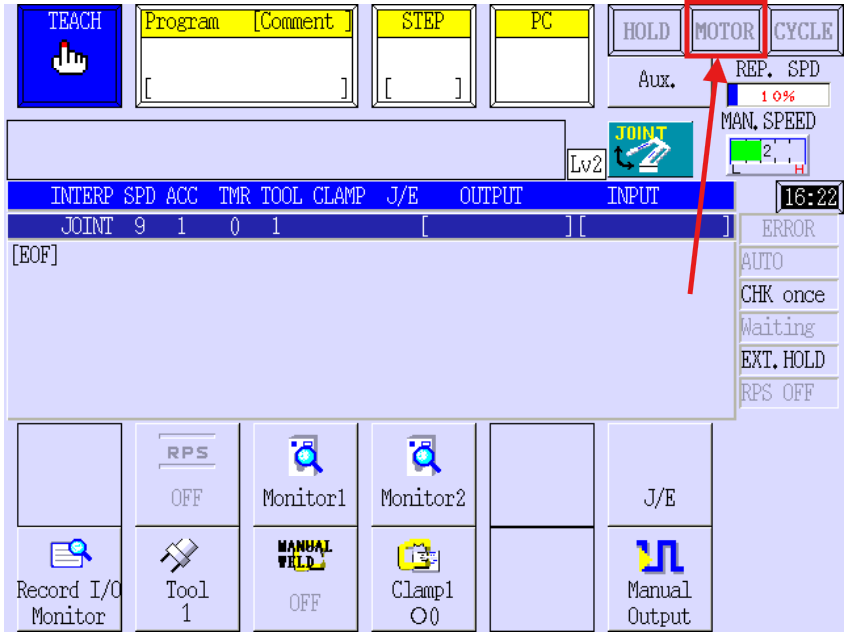
- Press and hold the "A" button on the pendant and press the "Motor On" button. If the motor successfully turns on, there should be an audible "click" of the brake locks disengaging.
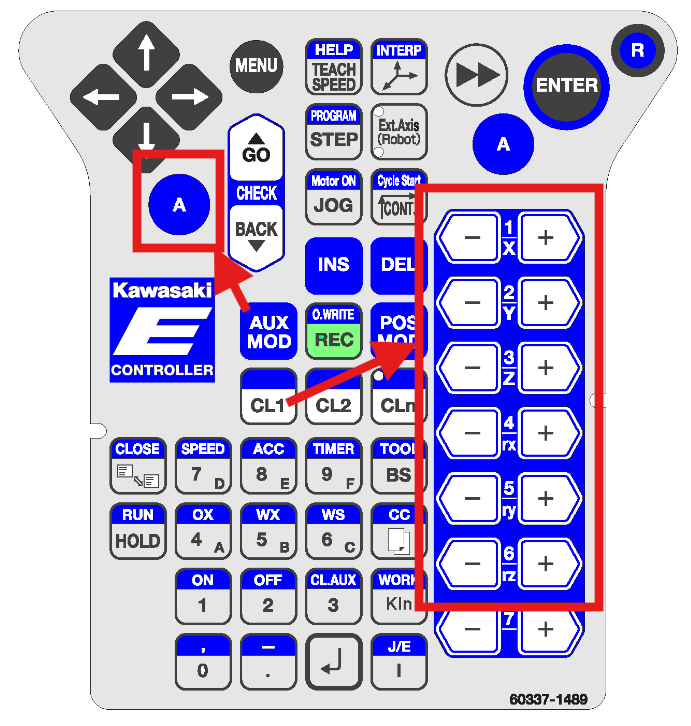
- Hold the "A" button and press one of the axis jog buttons (-X, +X, -Y, +Y, -Z, +Z, etc) to jog the robot. Holding the jog button will continue to jog the robot.
Always exercise caution when jogging the robot. At any point, pressing the red ESTOP button, or releasing the dead man’s switch will immediately halt the robot.
- After jogging the robot, remember to put the teach pendant and robot controller back into Repeat mode. This allows the PLC to remotely start the robot.